Some recipes are just pure nostalgia. This sweet potato candy is one of those old-school, humble treats that doesn’t look like much—but once you try a bite, it hits you with all the warm fuzzies. Think soft, fudge-like slices with a sweet swirl of peanut butter, or Nutella if you’re feeling cheeky. And the best part? It’s made with just a few pantry ingredients and one small sweet potato.
This isn’t diet food. Let’s just get that out of the way. But around the holidays or for those bake sales where everything has to stand out, this one’s a real crowd-pleaser.
Where This Recipe Comes From (And Why I Love It)
The first time I made this candy, it was purely out of curiosity. I had a leftover sweet potato, a mountain of powdered sugar from Diwali baking, and no intention of turning on the oven. I remembered reading about old Southern treats made during tough times—this one especially caught my eye for how it turned something so simple into something indulgent.
There’s debate over where it started—some say it was a Depression-era invention, others tie it back to Irish settlers who were potato pros. Either way, it’s one of those hand-me-down recipes that feels like it should be written on a yellowed recipe card in your grandmother’s handwriting.
What You’ll Need
Here’s what goes into the dough:
- 1 small sweet potato (or regular potato works too)
- 1 teaspoon vanilla extract
- 6–7 cups powdered sugar
And for the filling—this is where you get to play:
- Classic peanut butter
- Nutella (if you’re in a chocolate mood)
- Cookie butter or biscoff (my weakness)
Tip: I usually divide the dough into three parts and do a mix of fillings. It’s more fun that way, and there’s something for everyone.
Step-by-Step: Making the Candy Dough
Start by peeling and cubing your sweet potato. I usually boil it in a small saucepan until fork-tender. Then mash it up really well—you want it as smooth as possible. You’ll need about ½ cup mashed.
While it’s still warm (not hot), mix it with 2 cups of powdered sugar. The texture will look loose and almost wrong at this point—don’t panic, this is normal.
Stir in the vanilla, and then slowly keep adding powdered sugar, 1 cup at a time. At first, it feels sticky, but after about 6 or 7 cups, it turns into a soft, pliable dough that’s not too sticky. Like a sugary playdough you want to eat.
Rolling and Filling: My Favorite Part
Sprinkle powdered sugar on a sheet of wax paper and place your dough on top. Add another sheet of wax paper and roll it out to about ¼-inch thickness. I like to trim the edges so I can get nice, neat logs—and I save those trimmings for bonus treats later.
Even if you’re using just one filling, divide the dough into smaller rectangles—rolling a huge one is just asking for it to break. Smaller rolls = cleaner slices.
Spread your filling of choice edge to edge. I usually go for one peanut butter, one Nutella, and one with cookie butter or biscoff. You can even get creative with combos like peanut butter + a drizzle of honey, or cookie butter + crushed graham crackers.
Then roll tightly from the long edge, not the short one. You want long, neat spirals, not chubby little rolls.
Wrap each roll in wax paper, cut in half if needed, and chill in the fridge for about an hour.
Slice and Serve
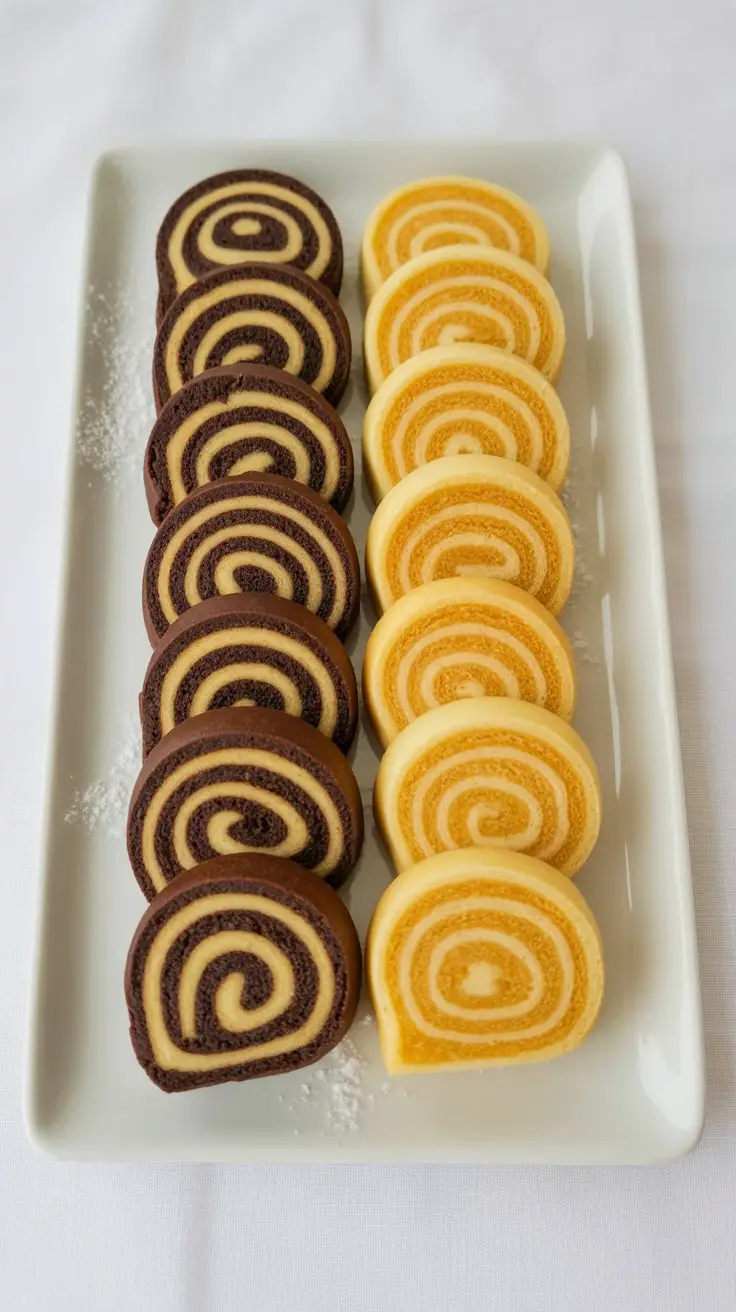
Once chilled, slice into ¾-inch pieces and you’ve got the cutest candy pinwheels. Soft, sweet, a little sticky, and just the right amount of indulgent.
If you’re anything like me, you’ll have a few rough edges or scraps left. Don’t toss them—roll them into balls and dust with cocoa powder or cinnamon sugar. My nephews treat them like bonus candy.
Extra Ideas for Fillings
Last time I brought these to a friend’s dinner party, someone suggested using marshmallow fluff inside. I laughed—then I tried it—and now I think they were absolutely right. It’s dangerously good.
Here are a few more fun filling ideas:
- Almond butter + chopped dried cherries
- Biscoff + crushed gingersnaps
- Peanut butter + mini chocolate chips
- White chocolate spread + toasted coconut
- Tahini + honey (for a sesame twist)
- If you experiment with something new and it turns out great, let me know. I’m always looking for new spins on this classic.
Make-Ahead Tips
These candies are perfect for making ahead of time. Once they’re chilled and sliced, I keep them in an airtight container in the fridge for up to a week. They also freeze beautifully—just wrap the logs tightly before slicing and stash them in a zip-top bag. Let them thaw in the fridge before slicing and serving.
How I Like to Serve These
I usually plate them up for dessert with coffee after dinner, but they’re also great for:
- Bake sales (they’re eye-catching and cheap to make!)
- Holiday gift boxes—wrap a few slices in parchment and tie with string
- Festive cookie trays—adds color and texture among all the baked cookies

Storage Notes
Keep your slices in an airtight container in the fridge. They stay soft but firm for about 5–7 days. If the edges dry out, just warm them slightly or let them sit at room temp before serving.
If you make a big batch, you can freeze the rolled logs (unsliced) for up to 2 months. I wrap them in wax paper and tuck them inside freezer bags.
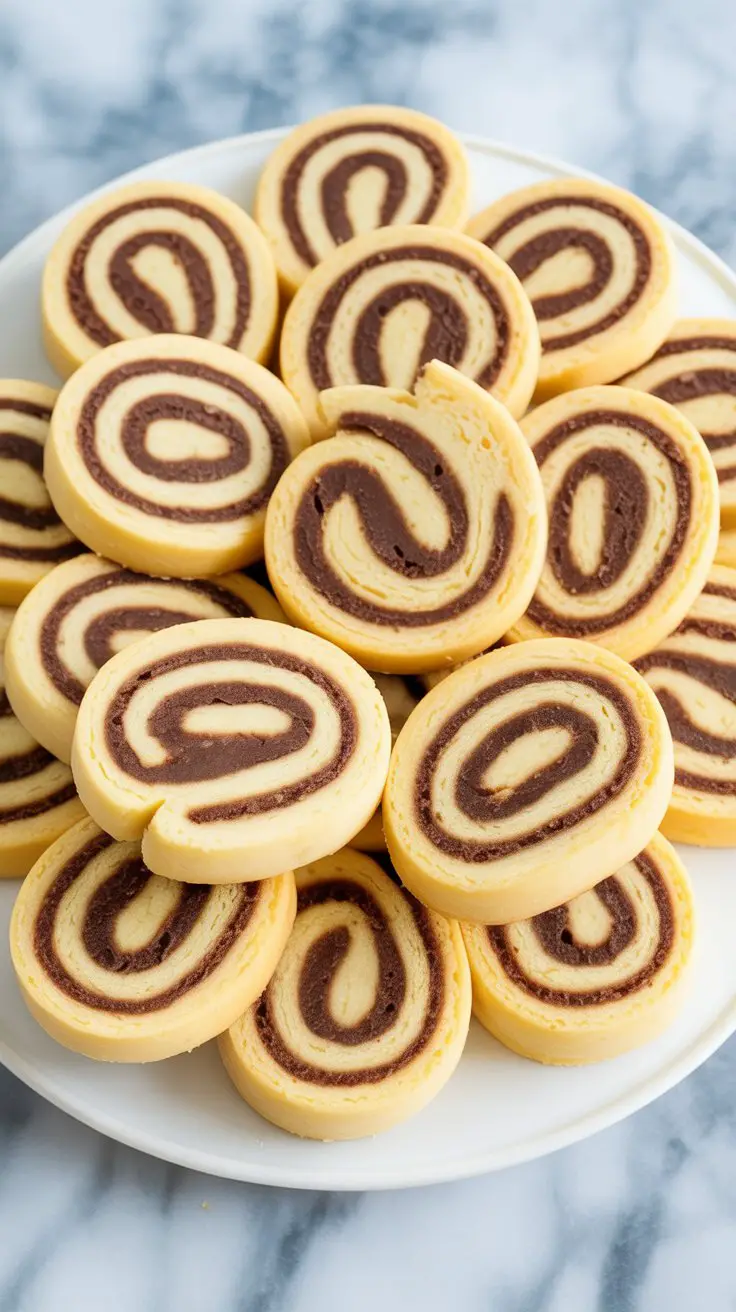
Sweet Potato Candy
This old-fashioned sweet potato candy is one of those feel-good recipes that shows up at every holiday gathering—and disappears just as fast. Soft, creamy, and filled with your favorite spreads like peanut butter or cookie butter, it’s a nostalgic little treat with a twist. The best part? It’s ridiculously easy to make.
Ingredients
- 1 tsp vanilla extract
- 2/3 cup chocolate hazelnut spread
- 2/3 cup cookie butter
- 2/3 cup peanut butter
- 1 small sweet potato
- 6–7 cups powdered sugar, plus extra for dusting
Instructions
- Start by peeling and dicing your sweet potato, then boil it until fork-tender. Drain well and mash until smooth, letting it cool down a bit before moving on.
- In a large bowl, combine the mashed sweet potato with about 2 cups of powdered sugar. It’ll look very soft at this stage—totally normal. Stir in the vanilla extract, then gradually mix in more powdered sugar, about a cup at a time, until you get a stiff, pliable dough.
- Dust a sheet of wax paper with powdered sugar and place your dough on top. Sprinkle a little more sugar over it, then cover with another sheet of wax paper. Roll the dough out into a ¼-inch thick rectangle, trimming the edges for a clean finish.
- Divide the rectangle into three equal sections. Spread each one with a different filling—peanut butter, cookie butter, or chocolate hazelnut spread. Once the layers are spread evenly, gently roll each section up lengthwise, jelly-roll style. Wrap the rolls in wax paper, cut them in half if needed, and chill them in the fridge for about an hour to firm up.
- Once chilled, slice into thick, candy-like rounds—about ¾ inch thick—and enjoy!
Nutrition Information
Yield
36Serving Size
1Amount Per Serving Calories 876Total Fat 6gSaturated Fat 2gTrans Fat 0gUnsaturated Fat 3gCholesterol 0mgSodium 41mgCarbohydrates 211gFiber 1gSugar 204gProtein 1g
dinnerbytes.com, occasionally offers nutritional information for recipes contained on this site. This information is provided as a courtesy and is an estimate only. This information comes from online calculators. Although dinnerbytes.com attempts to provide accurate nutritional information, these figures are only estimates.
Quick FAQ
Can I use regular potatoes instead of sweet potatoes?
Yes, but the flavor will be milder. Sweet potatoes give that lovely caramel-like depth.
Why is my dough too sticky?
You probably didn’t add enough powdered sugar yet. Just keep mixing in small amounts until it firms up.
Can I skip the vanilla?
You can, but I think it adds a nice warmth to balance the sugar. A dash of cinnamon also works well.
Do I need to cook the filling?
Nope! Everything is no-bake and stays soft.
Try Other Sweet Potatoes Recipes: